Congratulations on developing your app! Now, it’s time to share your creation with the world. To distribute your app on iPhones and iPads, securing your iOS Developer License is essential. This vital license not only provides access to powerful development tools and resources, but it also enables you to test your app on real devices and reach millions of users through the App Store.
In this guide, we’ll walk you through the straightforward process of obtaining your iOS Developer License, ensuring you’re fully equipped to take your app from concept to reality in the dynamic Apple ecosystem. Let’s get started on this exciting next step!
Step 1: Create an Apple Account
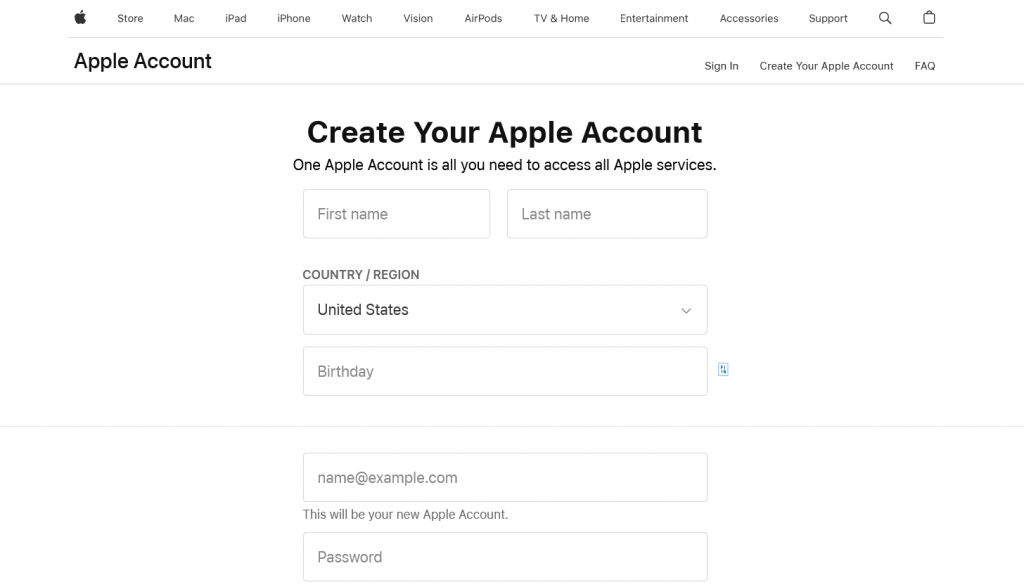
Before you can apply for an iOS Developer License, you need to have an Apple Account. If you don’t have one, follow these steps:
- Visit the Account Creation Page: Go to the account creation and click on “Create Your Apple Account.”
- Fill in Your Details: Provide your name, email address, and other required information.
- Verify Your Email: Apple will send a verification email to the address you provided. Follow the instructions in the email to verify your account.
Step 2: Enroll in the Apple Developer Program
Once you have an Apple Account, you can enroll in the Apple Developer Program. This program gives you access to all the tools and resources needed to develop and distribute iOS apps.
1. Visit the Apple Developer Program Enrollment Page: Go to the Apple Developer Program enrollment page and sign in with your Apple Account.
2. Choose Your Enrollment Type: You can enroll as an individual or as an organization. If you’re enrolling as an organization, you’ll need a D-U-N-S Number to verify your business’s identity, your organisation’s website, and legally binding authority.
3. Accept the License Agreement: Carefully read and accept the Apple Developer License Agreement.
4. Pay the Annual Fee: The cost of enrolling in the Apple Developer Program is $99 per year. You can pay this fee using a credit or debit card.
Step 3: Complete Your Developer Profile
After paying the enrollment fee, you’ll need to complete your developer profile. This includes providing your legal name, address, and other contact information.
1. Fill Out Your Developer Profile: Log in to your Apple Developer account and provide the required information.
2. Verify Your Details: Apple may ask you to verify your details by phone or email, especially if you’re enrolling as an organization.
Step 4: Access Developer Tools and Resources
With your iOS Developer License in place, you can now access Apple’s suite of development tools and resources.
Step 5: Publish Your App on the App Store
Once your app is ready, you can publish it on the App Store.
- Prepare Your App for Submission: Make sure your app meets all of Apple’s guidelines, including design and functionality standards.
- Create an App Store Listing: In your Apple Developer account, create an app listing that includes your app’s name, description, screenshots, and other necessary details.
- Submit for Review: Apple will review your app to ensure it complies with all App Store guidelines. This process can take a few days to a few weeks.
- Publish Your App: Once your app is approved, it will be published on the App Store, where users can download or purchase it.
Conclusion
In summary, getting your iOS Developer License is more than just a formality—it’s your gateway to bringing your app ideas to life on one of the most widely used platforms in the world. From creating your Apple account to enrolling in the Apple Developer Program, and finally publishing your app on the App Store, each step empowers you to tap into Apple’s robust ecosystem. Whether you’re an individual developer or a business, securing this license puts you on the path to reaching millions of users globally. With your iOS Developer License in hand, you’re all set to reach the world with your visionary app ideas.
