SendPulse is a powerful multi-channel marketing platform enabling businesses to create email campaigns, send SMS, manage push notifications, and more. If you’re new to SendPulse and want to set up an account, this guide will walk you through the entire process. We’ll also show you how to add a developer user to your account for seamless integration.
Step 1: Create a SendPulse Account
- Visit the SendPulse Website
Open your browser and go to https://sendpulse.com, the official website for SendPulse. - Click on “Sign Up”
On the homepage, you will see a “Sign Up” button at the top right. Click on it to begin creating your account. - Enter Your Information
You will be prompted to provide your email address, create a strong password, and enter your business name (Optional). Fill out the required fields and agree to SendPulse’s terms and conditions. - Click on “Sign Up”
Once you’ve entered your details, click the “Sign Up” button to complete the registration. - Confirm Your Email
You’ll receive a confirmation email from SendPulse. Open the email and click on the link to verify your email address. This will activate your account.
Step 2: Log In to Your SendPulse Account
- Go to the SendPulse Login Page
Once your email is verified, return to https://sendpulse.com and click the “Login” button at the top right. - Enter Your Credentials
Enter the email address and password you created during sign-up, then click “Log In” to access your account.
Step 3: Set Up Your Profile
- Complete Your Profile
After logging in, you may be asked to complete your profile by adding your company name, website, and other relevant information. This helps tailor your experience with SendPulse. - Add Payment Method (Optional)
While you can use SendPulse’s free plan, you might want to add a payment method to unlock premium features. Go to your account settings, select the “Billing” section, and enter your payment details.
Step 4: Add a Developer User
If you’re planning to integrate SendPulse with your website or app, you’ll need to add a developer user to your account. Here’s how:
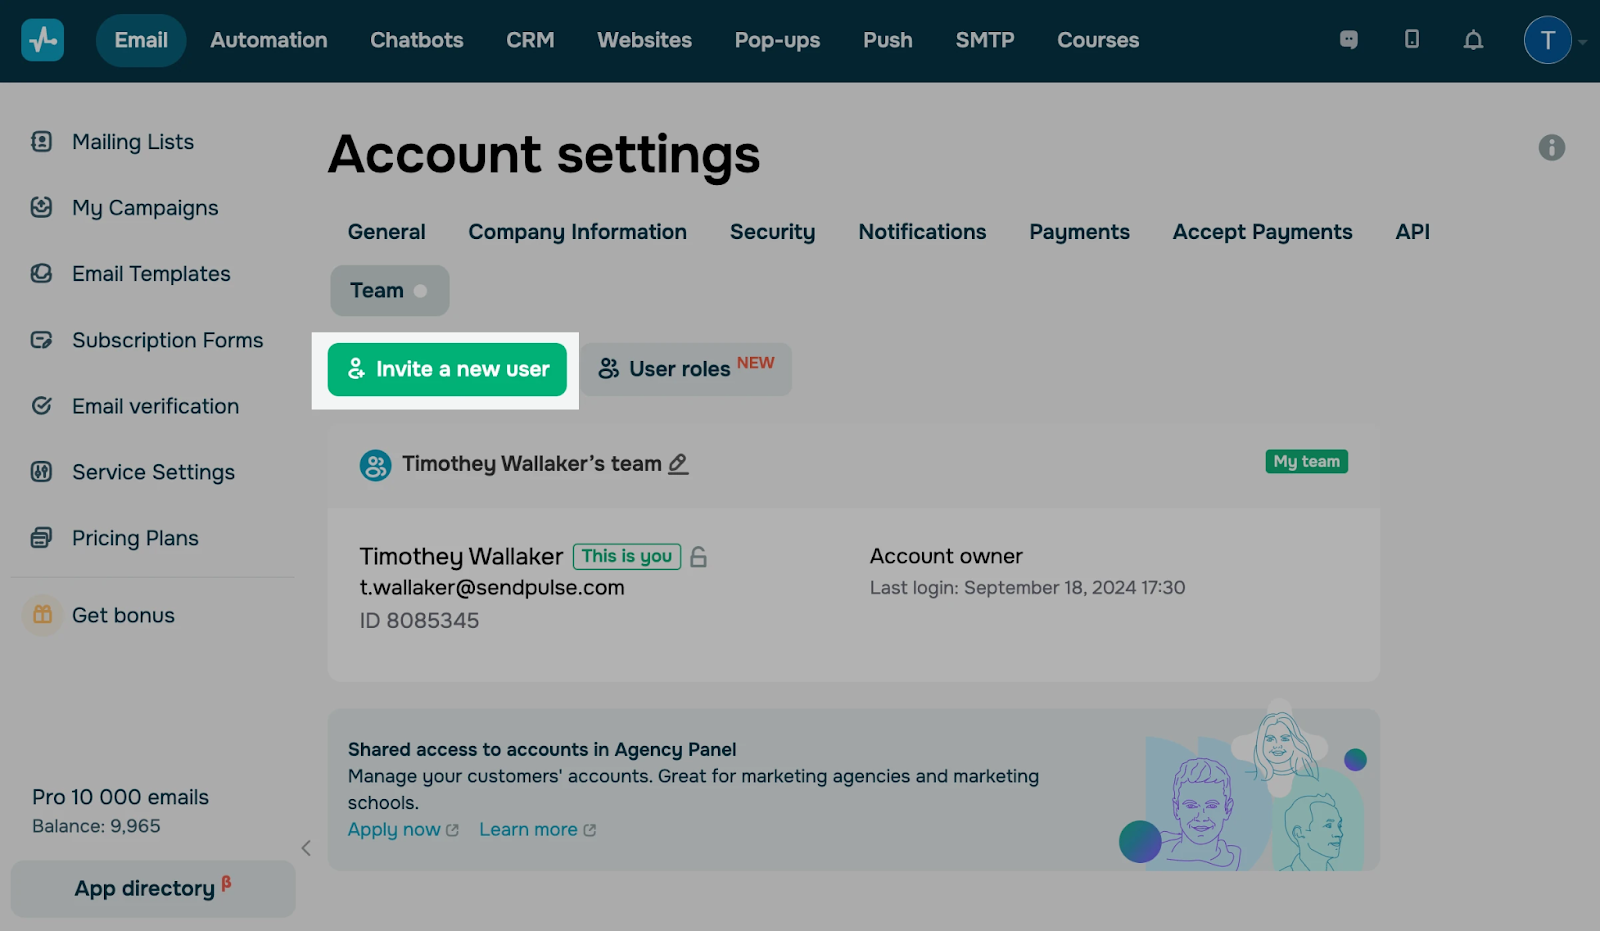
- Navigate to the Settings
Once logged into your SendPulse dashboard, click on your profile icon at the top right corner and select “Account Settings”. - Go to the “Team” Section
In the left-hand menu, find and click on the “Team” option. This is where you can manage your team members, including adding developer users. - Click on “Add User”
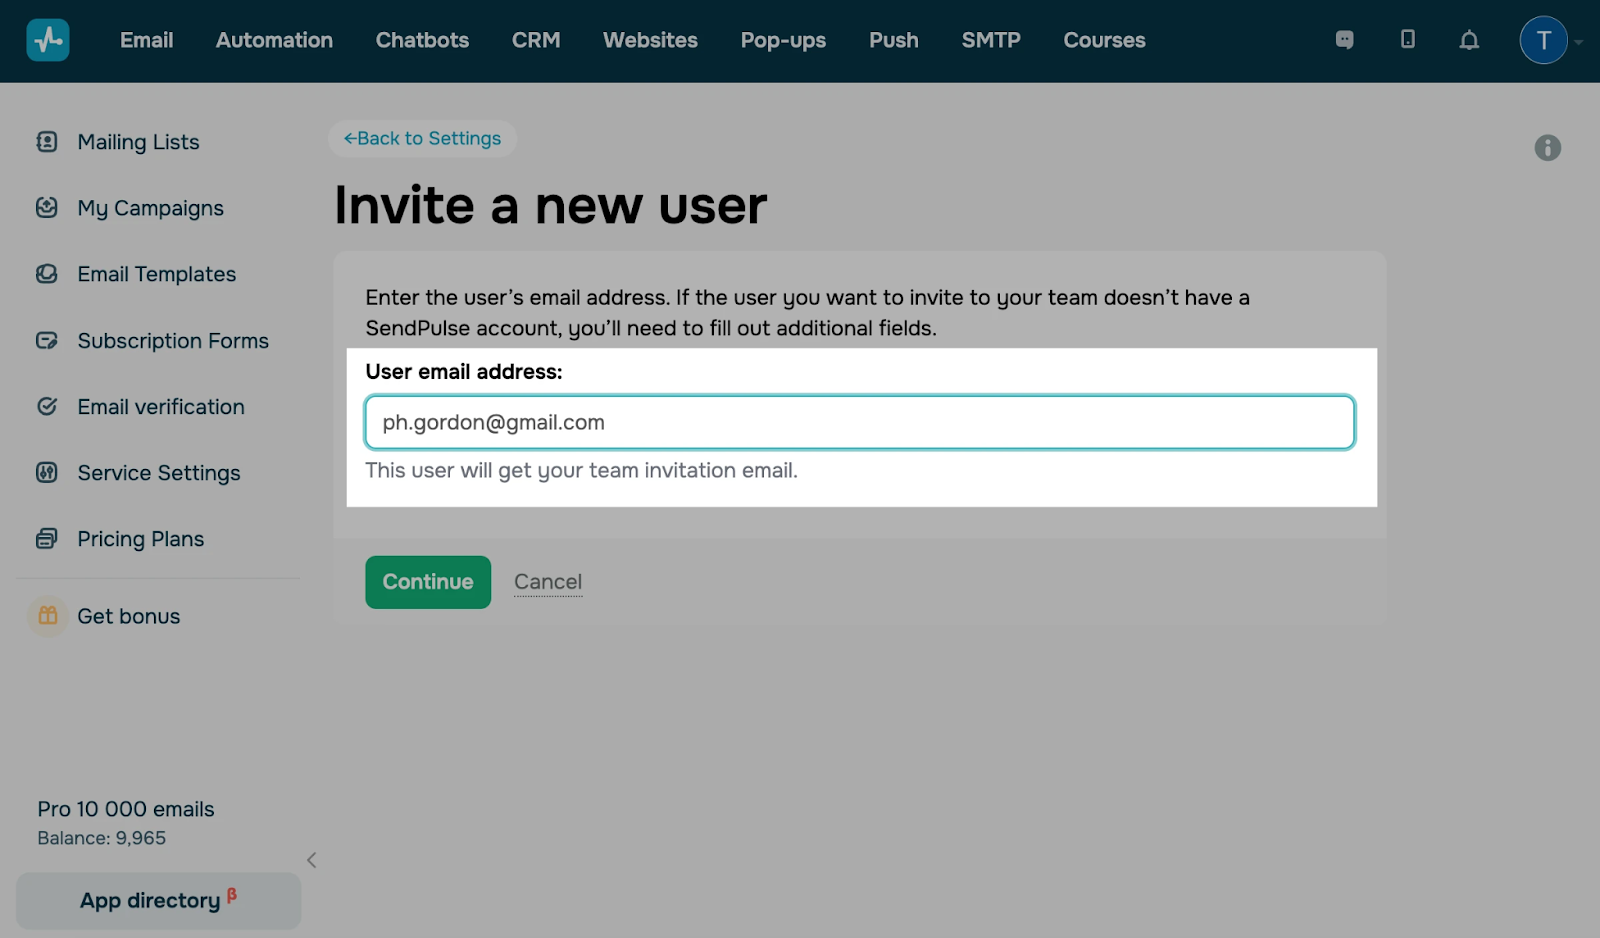
In the “Team” section, you will see an option to add a new user. Click on “Add User”. - Enter Developer Information
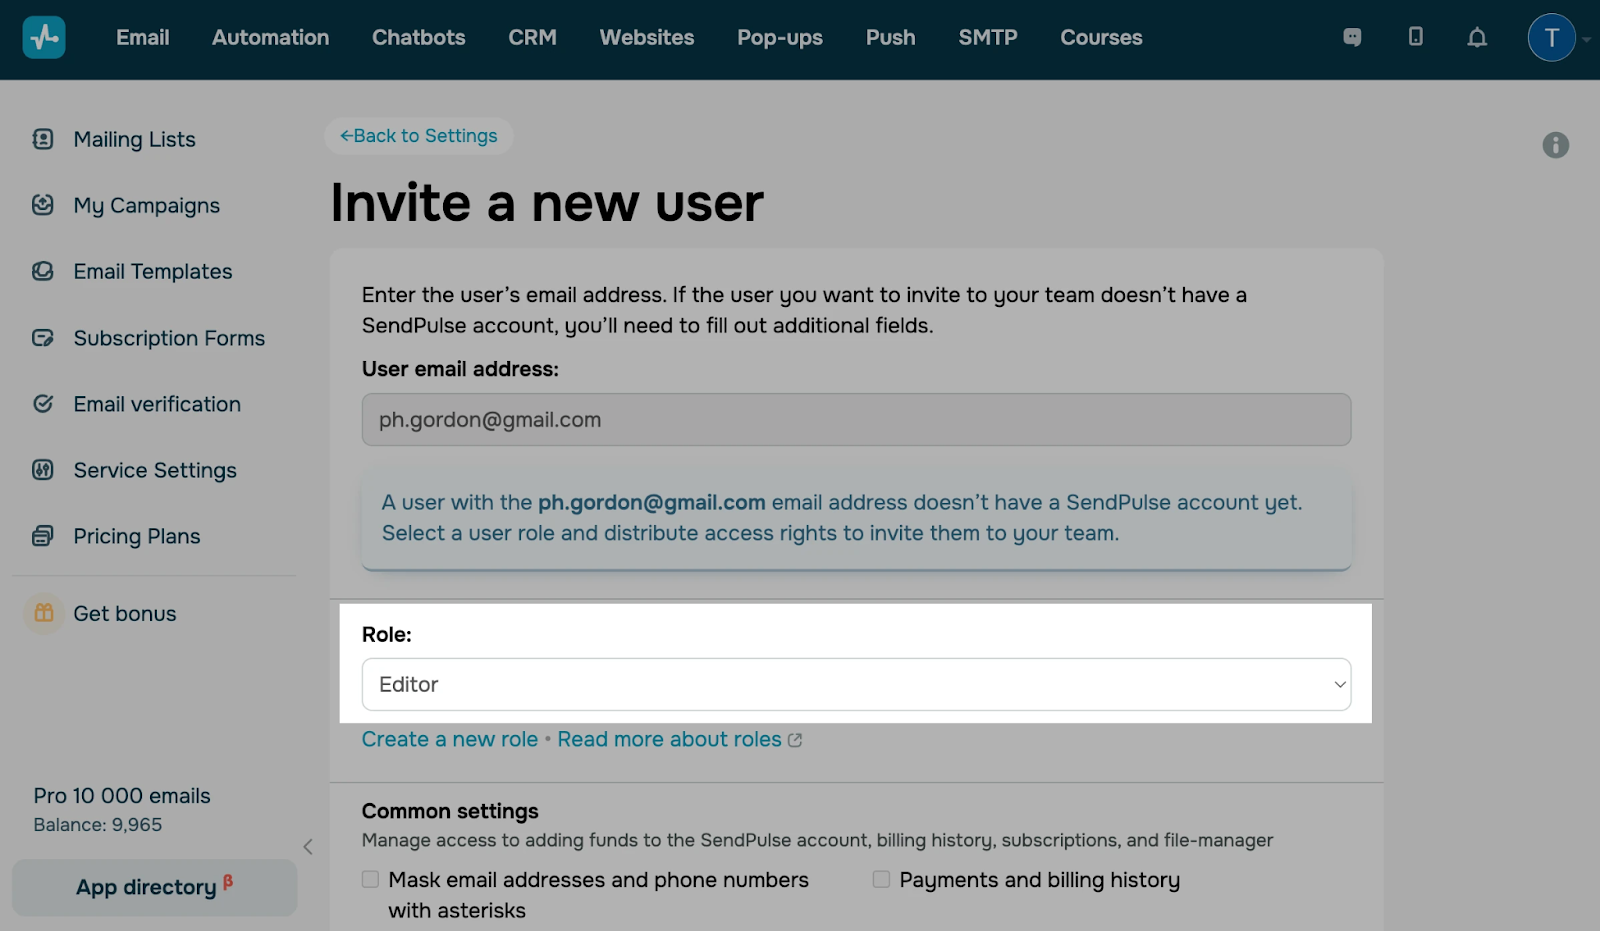
Fill in the developer’s details, including their email address. Choose the developer role from the dropdown options. The developer role grants permissions for API integrations and access to other developer tools, but restricts access to sensitive data like billing. - Send the Invitation
After filling in the necessary information, click “Send Invitation”. Your developer will receive an email with a link to join your SendPulse account. - Developer Accepts the Invitation
The developer will click on the link in the email to accept the invitation. After acceptance, they will have access to the developer tools in your SendPulse account.
Conclusion
Setting up a SendPulse account and adding a developer user is a simple yet essential step in leveraging the platform’s full potential for email marketing, SMS campaigns, and integrations. Whether you’re just starting or need to add a developer to integrate SendPulse into your systems, this guide should provide everything you need to get going.